Collaborative Video Editor
This is an exploration of how Adobe Premier Pro could support multiple editors on a single project. It includes user research, Figma prototyping, and user testing.
Background
In June 2020, I took CS 3750: Intro to User Interface Design as one of my first classes at Georgia Tech. This is a historically hands-on class that teaches the fundamentals of UX through a semester-long project. Due to the pandemic, the class was taught online, and we were asked to design a new way for people to collaborate remotely to accomodate “the new normal.”
Two other designers and I decided to focus on video editing, as we were all familiar with the challenges of working on a video project remotely. We wanted to explore how Adobe Premier Pro could support multiple editors on a single project.
User Research
We conducted user interviews via Zoom to safely understand the challenges of remote video editing. We interviewed several video editors of varying experience levels and asked them about their experiences working on projects remotely. Questions included: *****
Analysis
Our key findings were:
- Adobe Premier Pro is preferred by most video editors, but it is not designed for remote collaboration.
- Video editing software, in general, has a steep learning curve, making it difficult for beginners to use.
- Learning to use video editing software requires significant time and often involves searching for online tutorials.
- Premier Pro, in particular, is considered very difficult to use, even by experienced users, with users constantly discovering new features.
- Users desire features like auto-saving to prevent losing work and better file management to avoid broken project files.
With these insights, we set out to design a new way for people to collaborate on video projects remotely. Our research gave us three goals:
- Premier Pro is the most popular video editing software, so we needed to design a solution that would work within its existing framework.
- Video editing software is difficult to use, so we needed to make our design as intuitive as possible.
- Users want better file management and auto-saving features, so we needed to design a solution that would address these needs.
Ideating Solutions
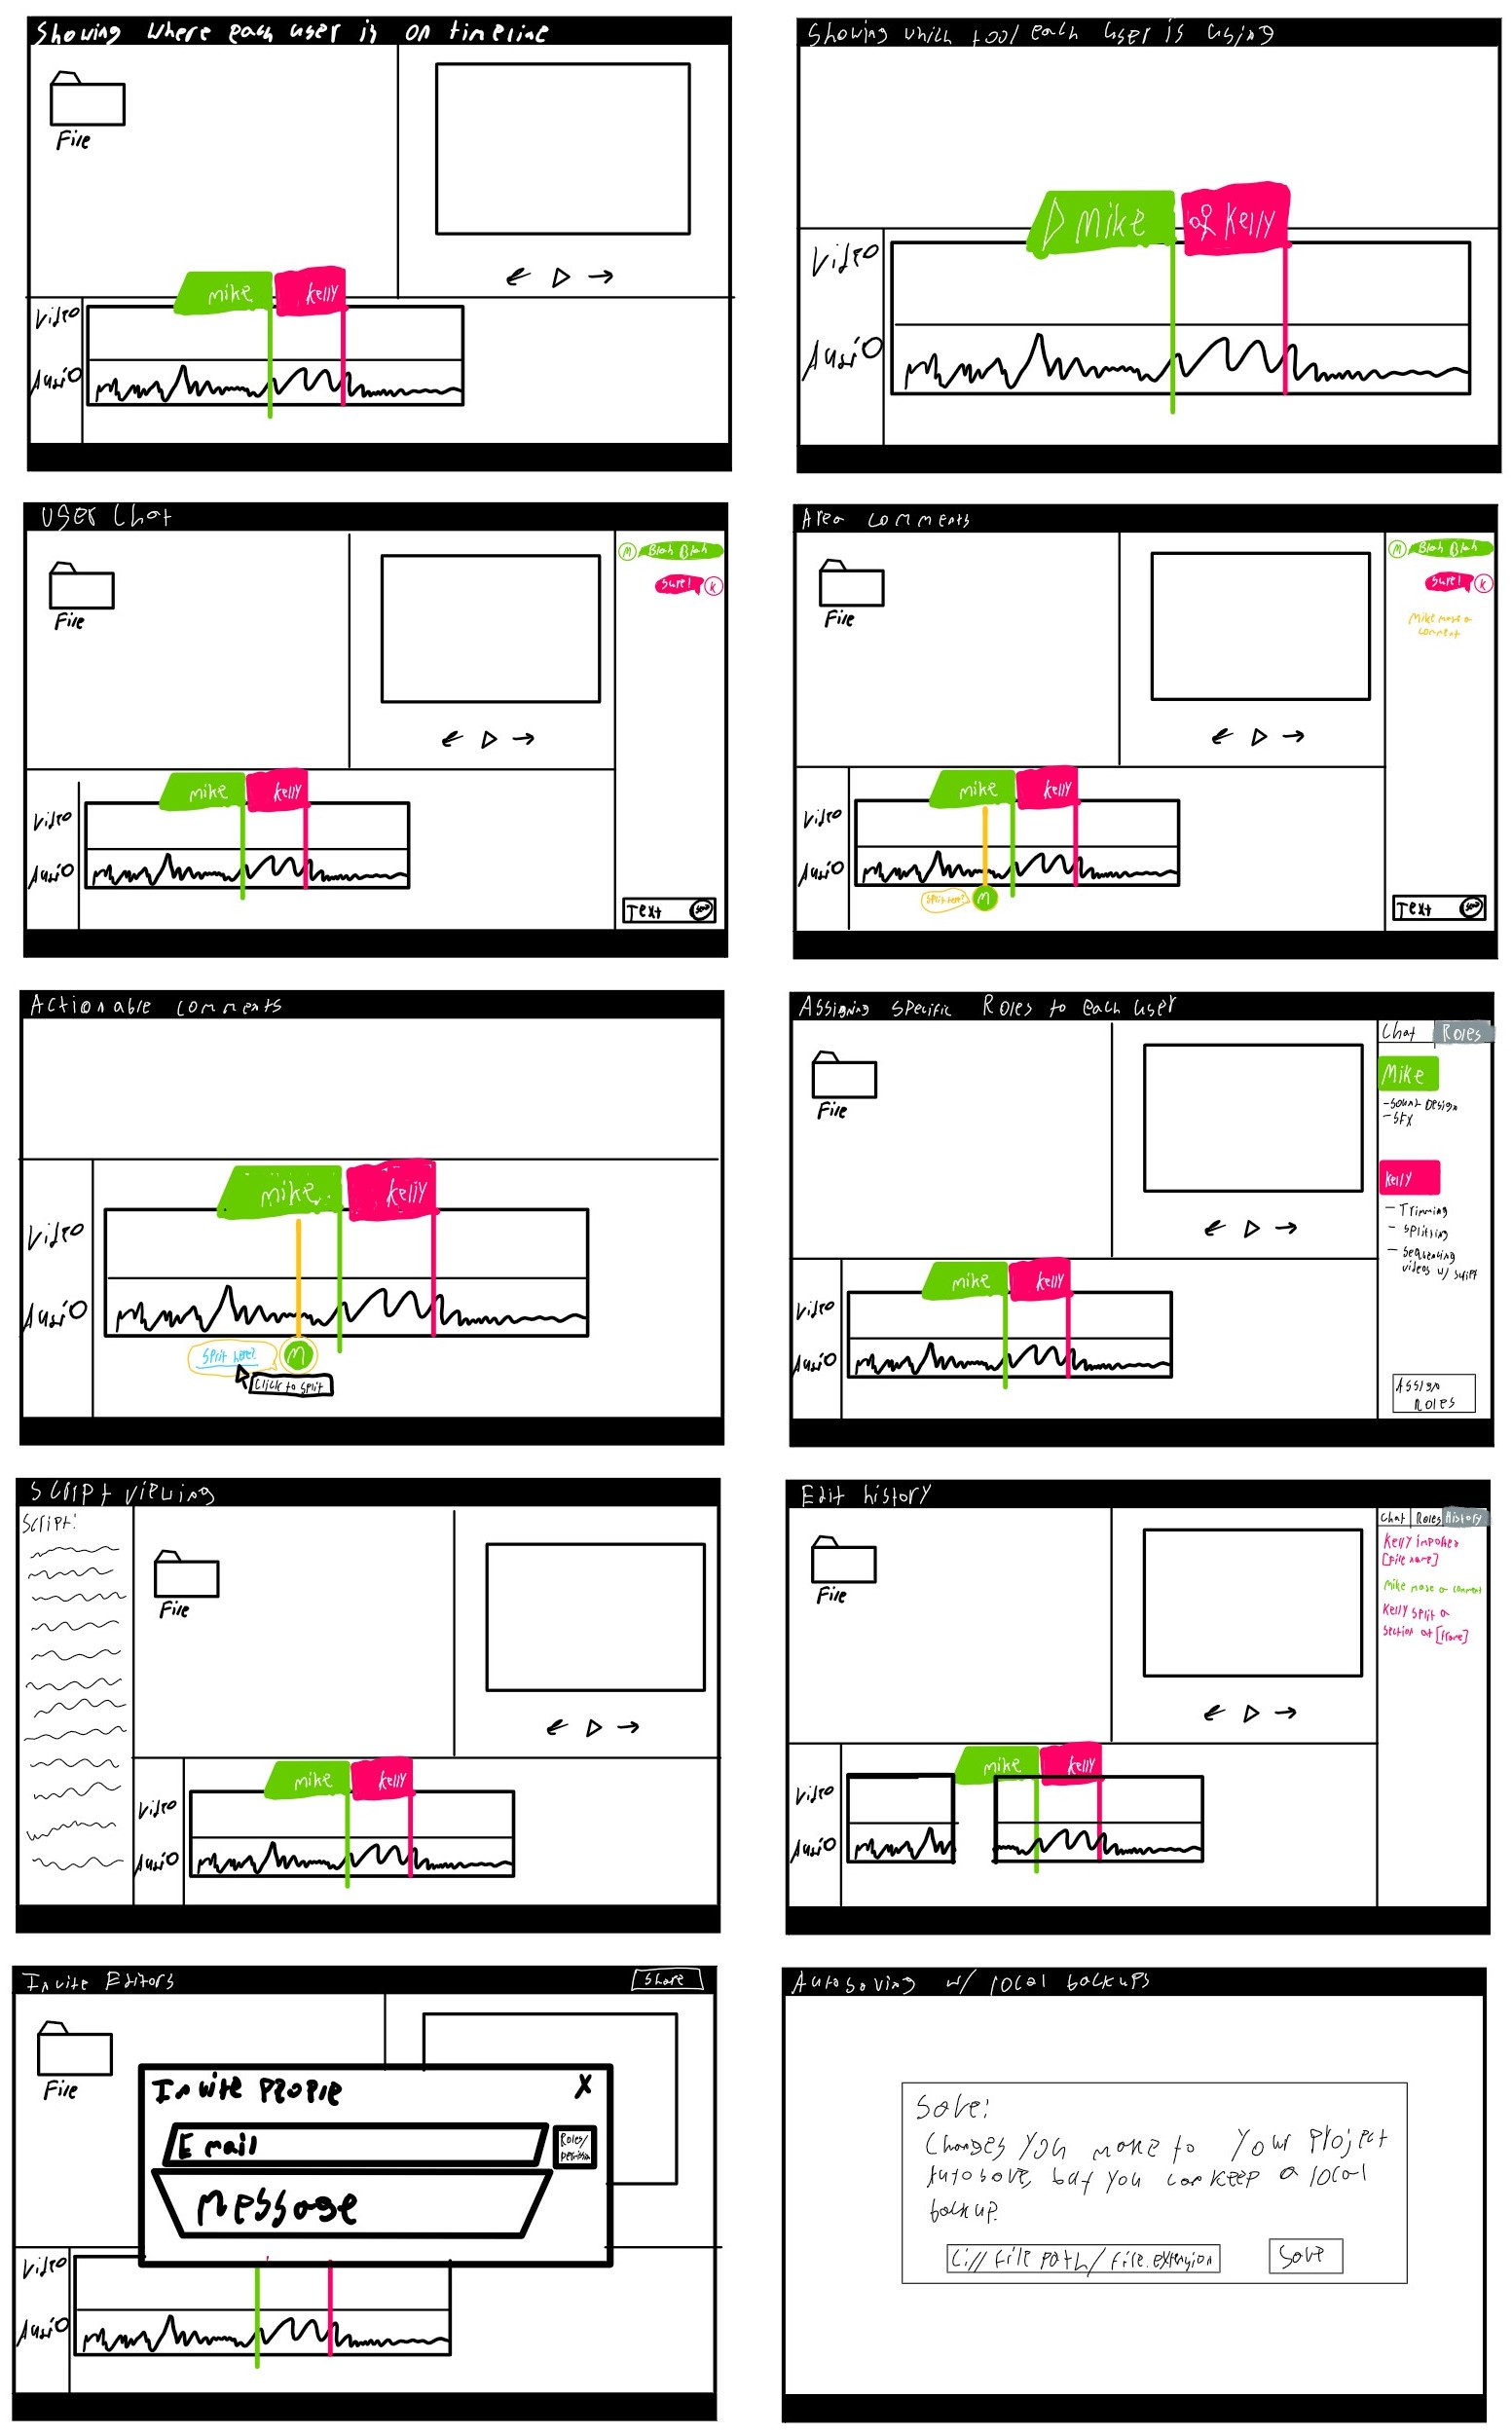 With our three goals in mind, we set out to design a new and intuitive way for video editors to collaborate in Premier Pro. We started by creating quick thumbnail sketches that showed the core features of our design. These included live chat, a shared timeline, comments, sharing with specific permissions, and the ability to see what each person is currently working on. This served as a basis for our prototype.
Prototyping
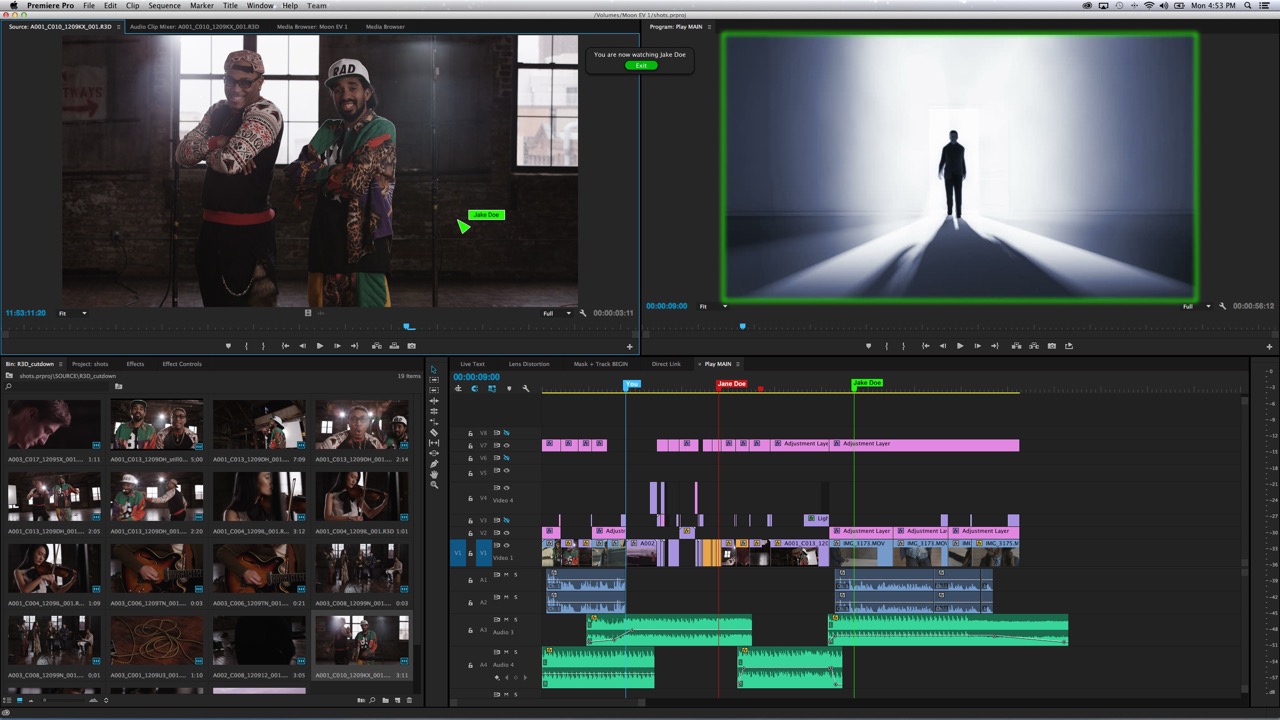
Once we had a solid design, we created a high-fidelity prototype in Figma. This prototype included all of the features we had designed and allowed users to interact with the design as if it were a real product.
We overlayed our new design on top of a screenshot of Premier Pro to show how it would fit into the existing software. This allowed us to create a more realistic prototype and helped users understand how our design would work in practice. It also made it easier for expierenced video editors to understand our design, as they were already familiar with the layout of Premier Pro.
User Testing
We conducted user testing with our prototype to see how users interacted with our design. We asked users to complete several tasks, such as adding a comment, viewing what another person is working on, and sharing a project with a specific person. We observed how users interacted with the design and asked them questions about their experience.
Conclusion
Overall, our design was well-received by users. They found the design intuitive and easy to use, and they appreciated the features we had included. In fact, one video editor was so excited by our design that he asked us when it would be released so he could use it in his work. He was very disappointed to learn that it was just a class project.
We did notice a few ways we could improve the project if it were to be developed. The biggest issue was that the less-experienced Premier Pro users were unable to find the new “Chat” button in the toolbar at the top of the screen. The button was almost immediately recognized by more experienced users though. Overall, the design was a success, and we were able to achieve our three goals.